
How to add a Facebook Pixel and connect your store to the Facebook shop on your Facebook Page
We've installed a plugin to help you connect your Facebook Pixel to your store as well as allow you to sell items in your Oxxle store directly on Facebook as well.
- Go to Plugins
- Activate Facebook for WooCommerce
- Go to Store Management (WooCommerce) -Settings-Integrations OR Marketing Menu (depending on which version of Facebook's plugin your store adopts)
- Facebook For WooCommerce
- Get Started and then follow the prompts to connect your Facebook page.

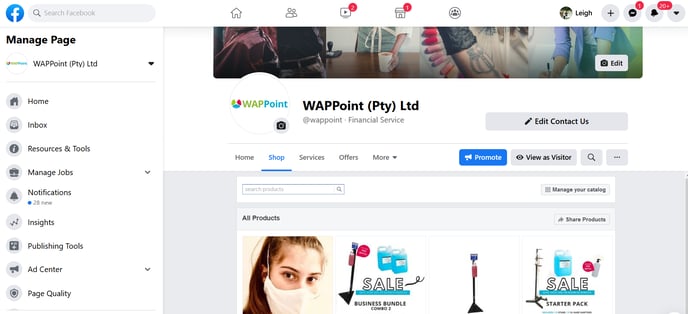
Once you have connected everything, you will be able to see all of the products in your Oxxle store on your Facebook shop.
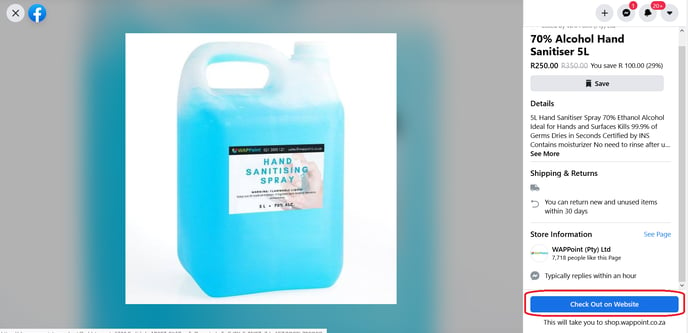
Once customers select a product, they can Checkout through your website.
You can also run ads directly from here and tweak any other settings related to Facebook.
If your website pages are not ready yet and you instantly want to start selling on Facebook, simply "disconnect" your Home page for now. You can easily put it back later on.
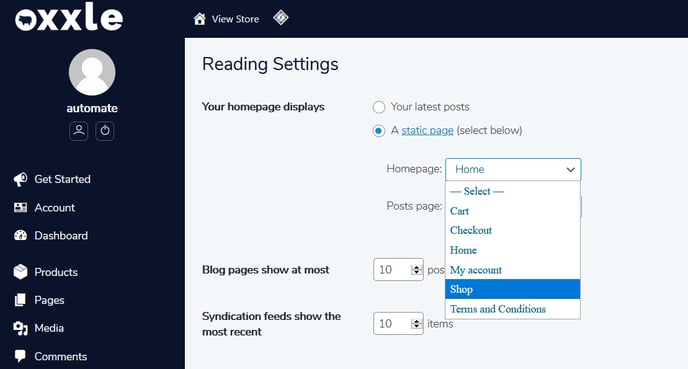
- Go to General Settings Menu
- Default Pages
- Change your Home page to Shop
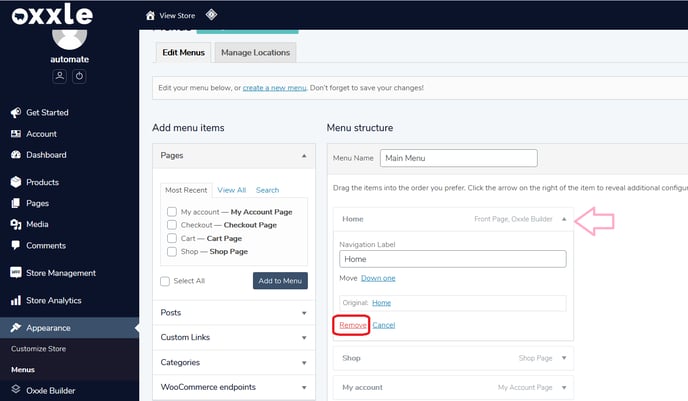
Then remove the Home page from your Menus
- Appearance
- Menus
- Home
- Click on the arrow
- Remove
More detailed instructions below:
Overview
Facebook for WooCommerce connects your WooCommerce store to Facebook to let you reach a wider audience. With this plugin, you can:
- Sync your WooCommerce catalog to Facebook to let customers browse your products from your Facebook Page shop and create product-based ads.
- Install Facebook pixel to support retargeting ads, find new customers, and track ad effectiveness.
- Use Facebook Messenger to easily chat with customers on your store or Facebook.
Getting Started
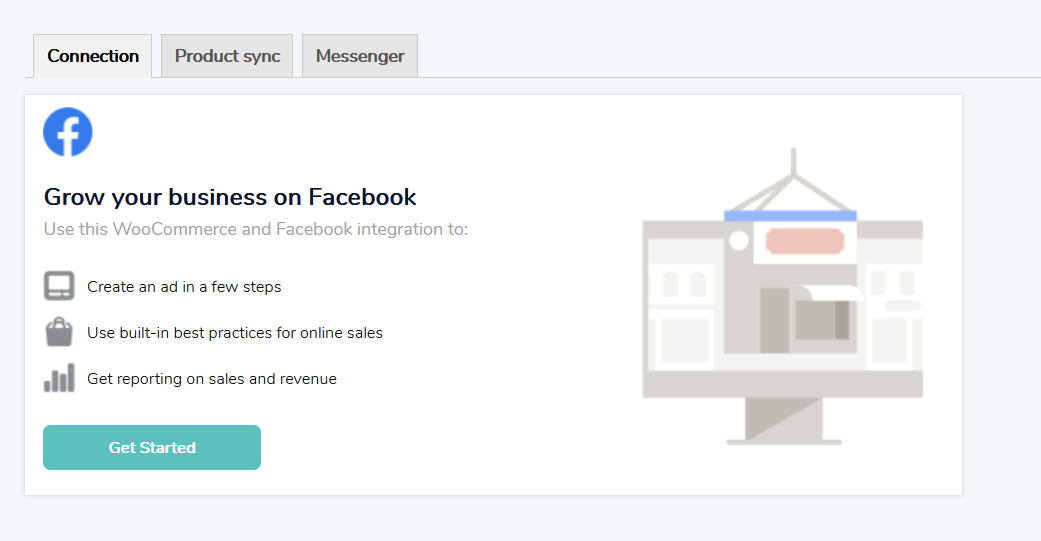
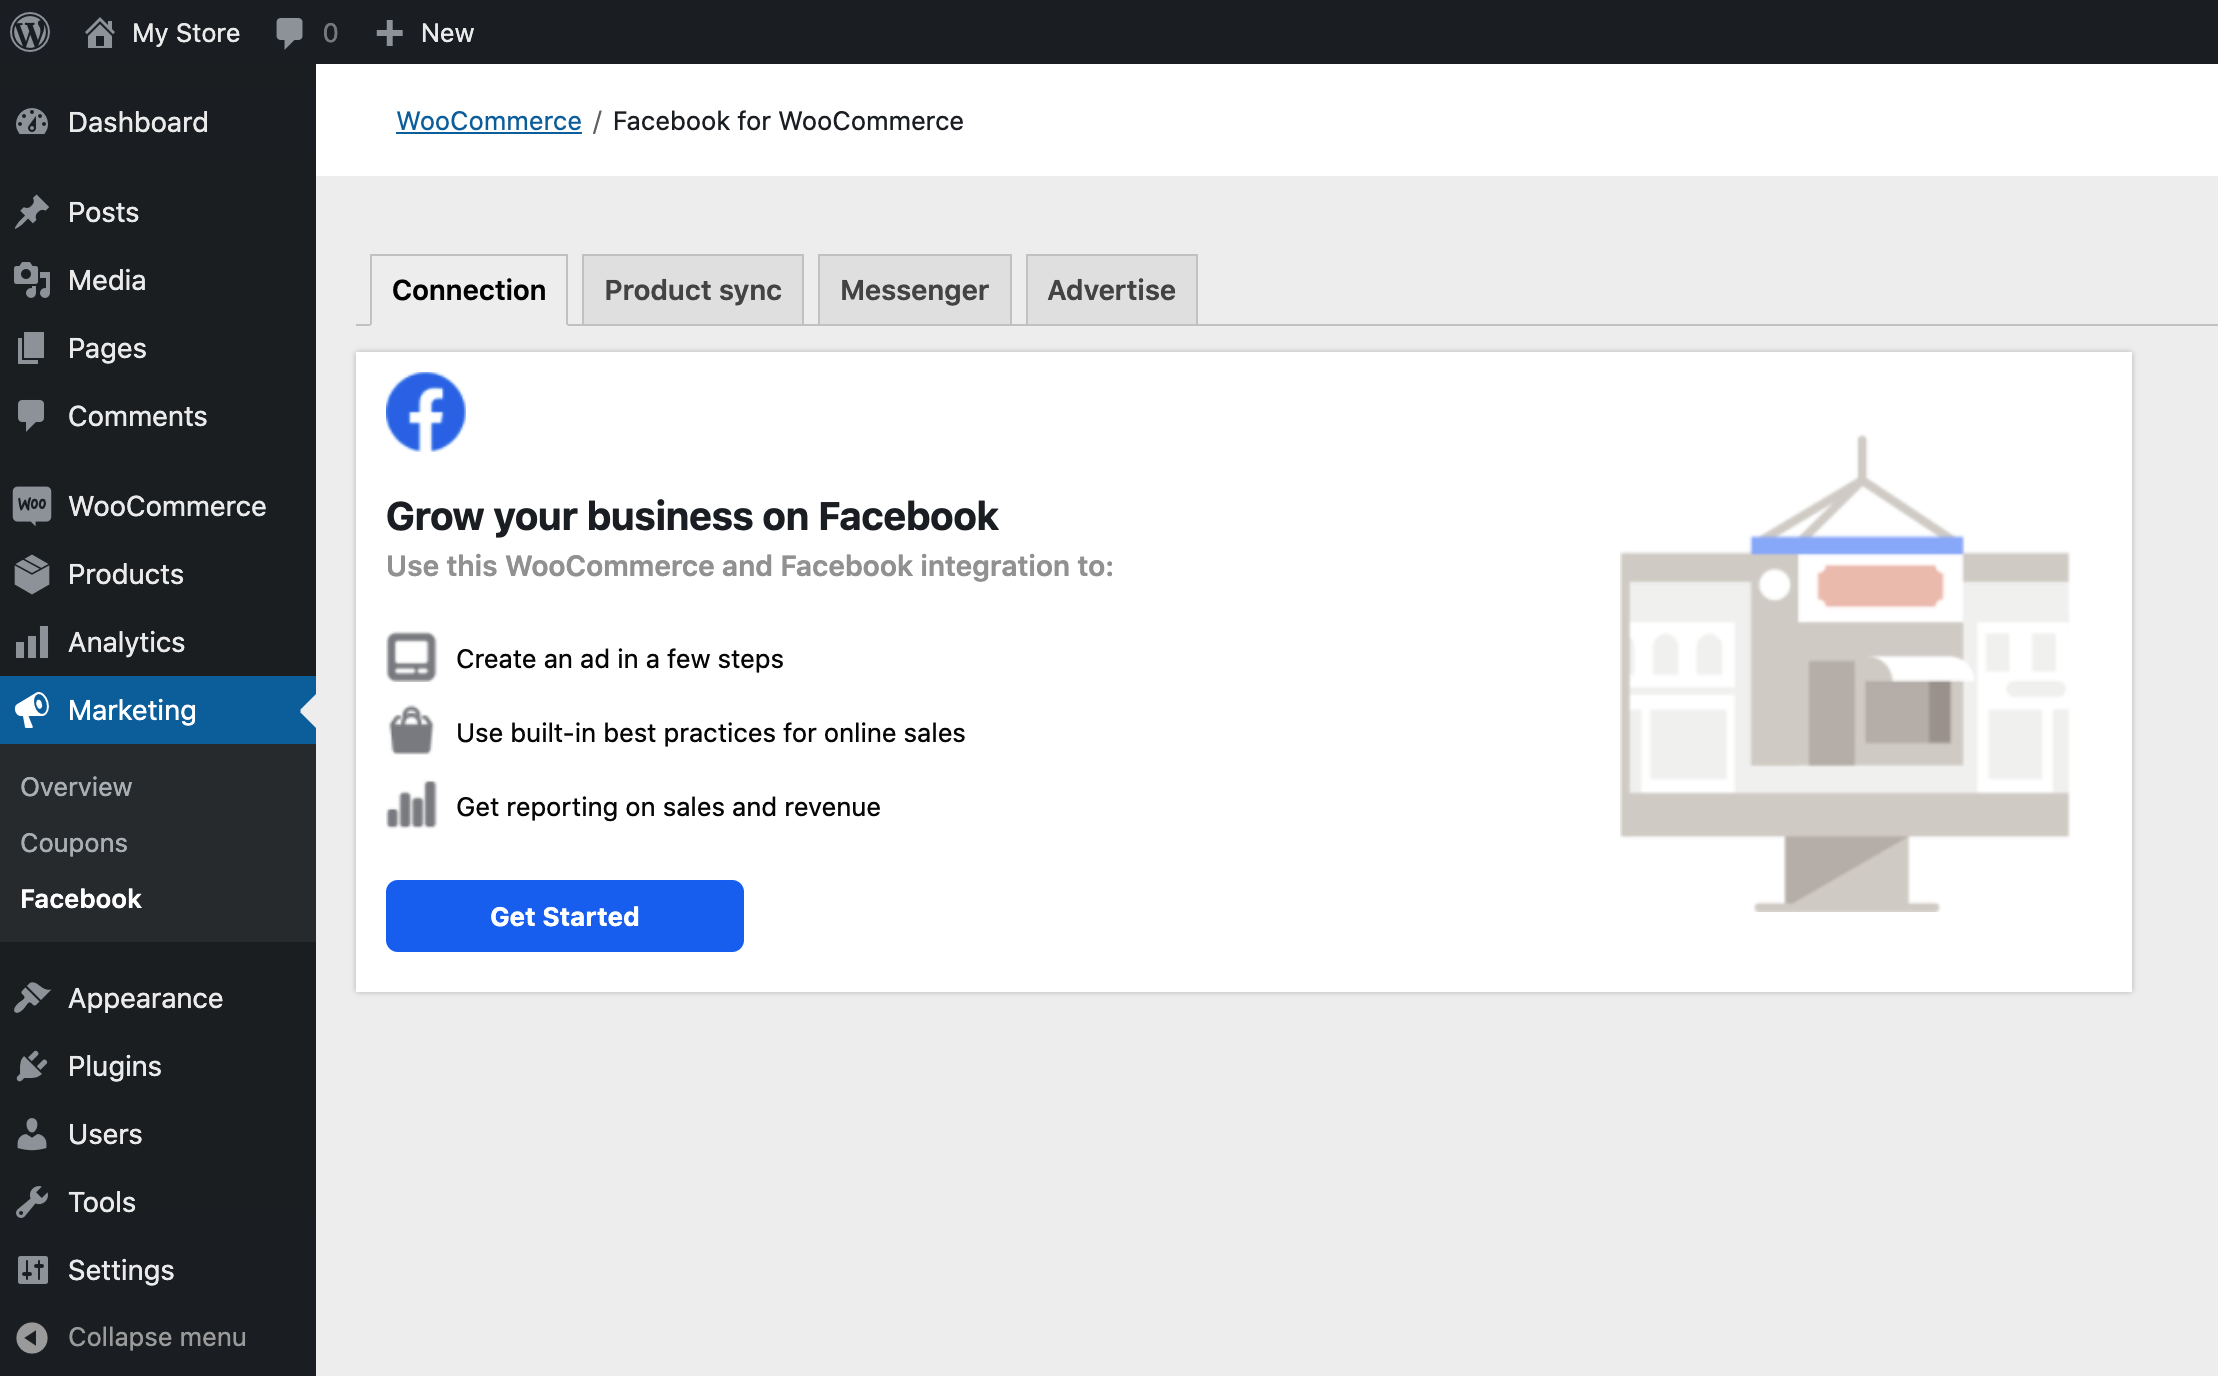 Pre-connection screen
Follow the steps below to connect your store to Facebook:
- Go to Marketing > Facebook and click Get Started.
- This will launch the Facebook setup wizard, which will ask you to:
- Login to Facebook, if you’re not already logged in elsewhere.
- Create new or choose existing Facebook assets to connect to this store:
- Authorize the connection between WooCommerce and Facebook for your business.
- Once setup is complete, you can go back to your site admin to configure other settings and features.
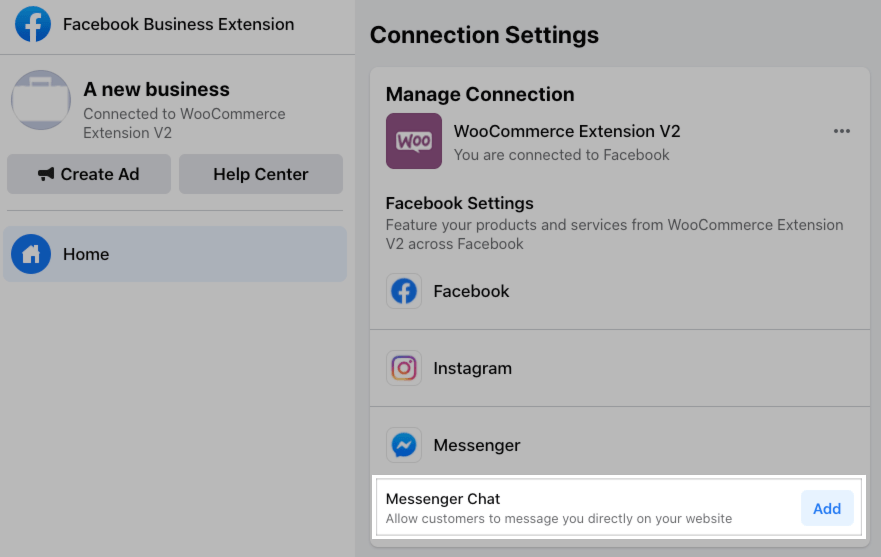
You can view your connected assets at any time from the Marketing > Facebook > Connection tab. To manage your connected assets and enable other features, such as setting up your Facebook Page Shop, click Manage Connection to open the Facebook Business Extension tool.
 Connection screen after an account has been connected.
Debug
Enable debug mode > Log plugin events for debugging.
This can be useful to troubleshoot sync problems or connection issues. As mentioned, only enable this if you are experiencing problems with the plugin.
Sync products to Facebook
Once your shop is connected to Facebook, your products can be set to sync to Facebook periodically and when products are updated within your WooCommerce store.
Note: The exclusion settings should be selected before enabling the product sync, as any products already synced will not be removed automatically after being excluded.
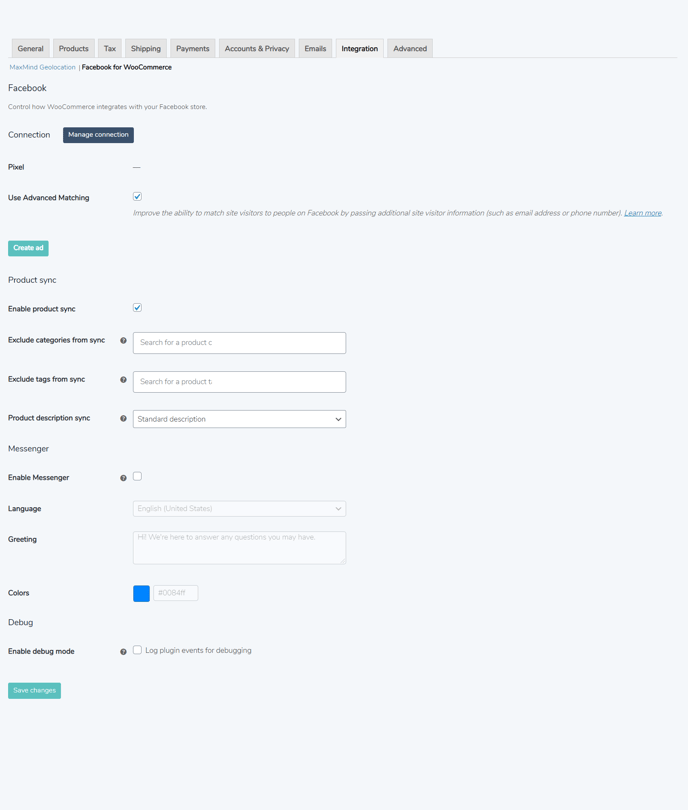
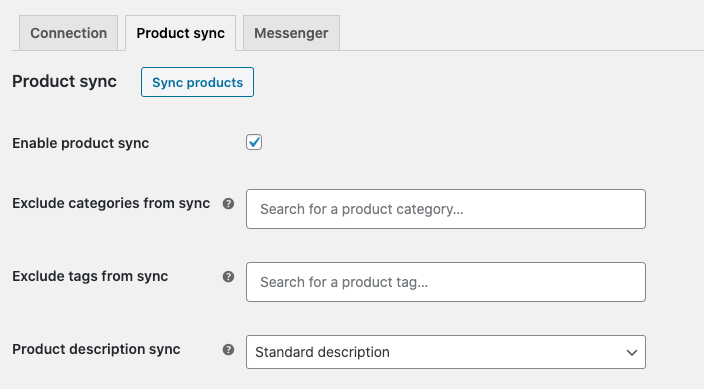
Global product sync settings
From Marketing > Facebook > Product sync, you can control global settings that will apply to all synced products.
- Enable product sync: Choose whether to sync products to your Facebook catalog.
- Exclude categories from sync: Select one or more categories of products that shouldn’t be synced to Facebook.
- Exclude tags from sync: Select one or more tags of products that shouldn’t be synced to Facebook.
- Product description sync: Choose whether to display the product’s standard or short description in the Facebook catalog.
Product sync settings
From the Products page, you can manage the sync settings and display options for individual products. You can use filters to view products based on their sync status and bulk actions to update sync status for multiple products.
When editing a product, you can navigate to the Facebook tab for simple products or the Variations tab for variable products to manage Facebook settings:
- Facebook sync: Choose whether the product should be synced and shown in the Facebook catalog, synced but hidden in the Facebook catalog, or not synced at all.
- Facebook description: Replace the default product description with a specific Facebook description, or leave blank to use the default description.
- Facebook product image: Choose what image should be used for this product on Facebook.
- Facebook price: Replace the default price with a specific Facebook price, or leave blank to use the default price.
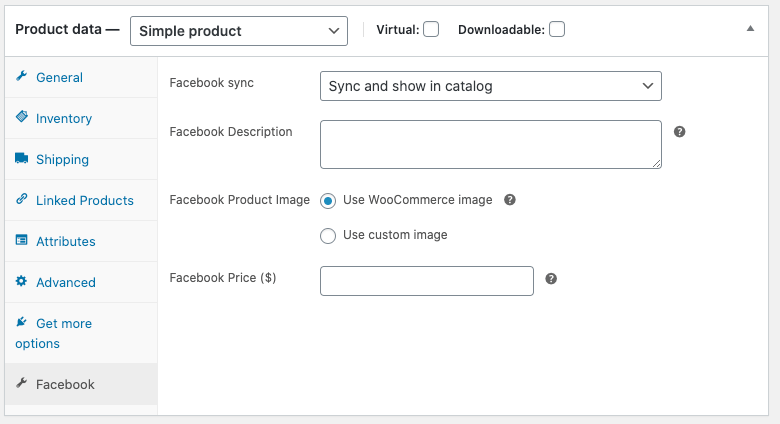 The Facebook product settings for a simple product.
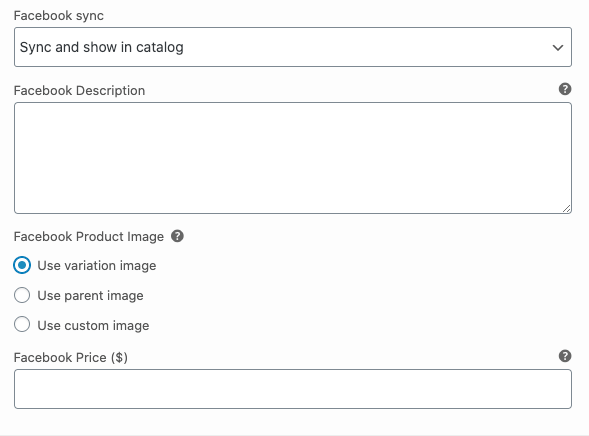 The Facebook product settings for a variable product.
Use Facebook Messenger
You can add Messenger to your site from Marketing > Facebook, clicking Manage Connection, and clicking Add by Messenger Chat.
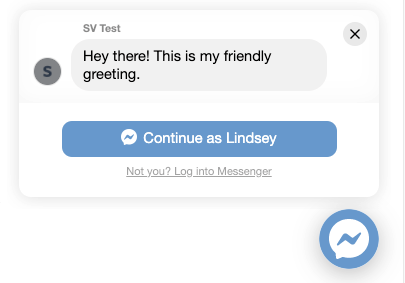
You can then adjust the language, default greeting, and widget color to better match your site’s brand and voice.

Once enabled, the Messenger widget will appear on your site so customers can chat with you. Conversations can carry over between Facebook and your WooCommerce site.
You can view your Messenger settings from the Marketing > Facebook > Messenger tab.

Setting your away hours and message
In Facebook, you can configure days and times when Messenger should automatically send an away message to your customers that start chatting. These settings apply to Messenger in Facebook and on your WooCommerce site.
It’s important to set yourself as “away” when you can’t respond quickly to messages, both to provide good customer service and to ensure your reported response rate / time calculations published on your Facebook Page aren’t negatively impacted by long delays.
Follow the steps below to configure your away times and message:
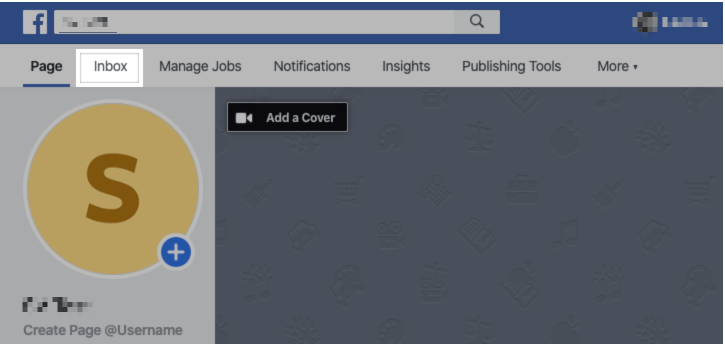
- Login to Facebook and go to your business page.
- Click Inbox.
- Go to Automated Responses.
- On the Away message tab, click Edit.
- In the Timing section, update the days/times to when you are away (i.e. set your “closed” hours). You can click the Add Time button to add new rows as needed. This will determine when the away message is sent after a customer chats in Messenger.
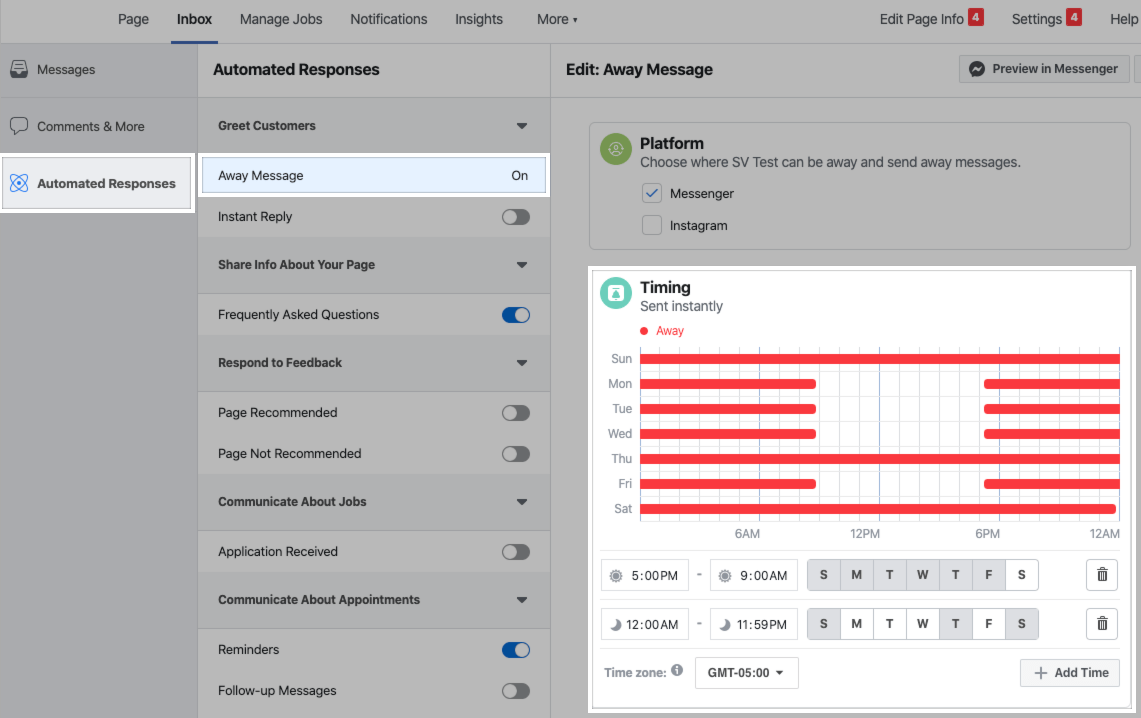
- In the Message section, update the away message text. Click Add Personalization to add merge tags to personalize the message with the customer’s name, your store name, etc. You can see a preview of the message on the right side of the screen.
- Click Save.

This message will now appear during the indicated days/times when a customer sends a message in Messenger from Facebook or your WooCommerce store.
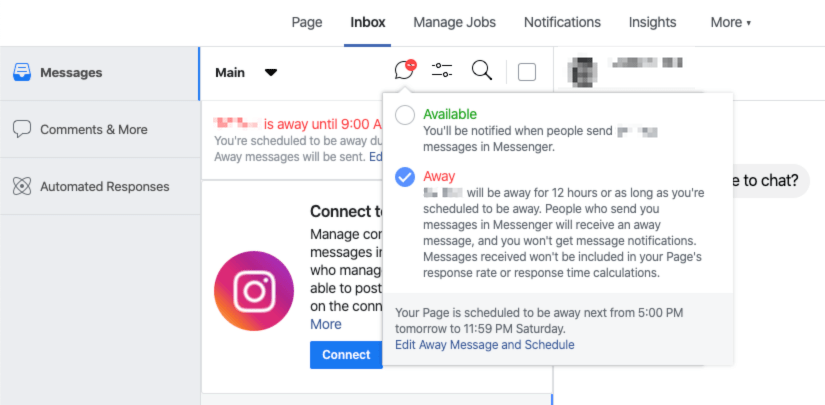
You can also set yourself as “away” outside of your scheduled away hours by going to the Inbox and selecting the messenger icon in the Main toolbar. From here, you can switch between “Available” and “Away”.
Frequently Asked Questions
How can I tell if the Facebook Pixel has been properly installed on my site?
The Pixel Helper is a small Chrome extension provided by Facebook which will allow you to verify that your pixel has been properly installed and works as expected. Learn more about the extension here and download it here.
I am getting an “Oops, something went wrong.” error. How can I connect to my Facebook account?

While this error can occur for a few different reasons, the most common seems to be in relation to Facebook’s supported currencies.
If your WooCommerce default currency is not on this list, some folks have had success temporarily changing their currency to a supported one (USD, CAD, GBP, EUR) to connect and then changing it back afterward.
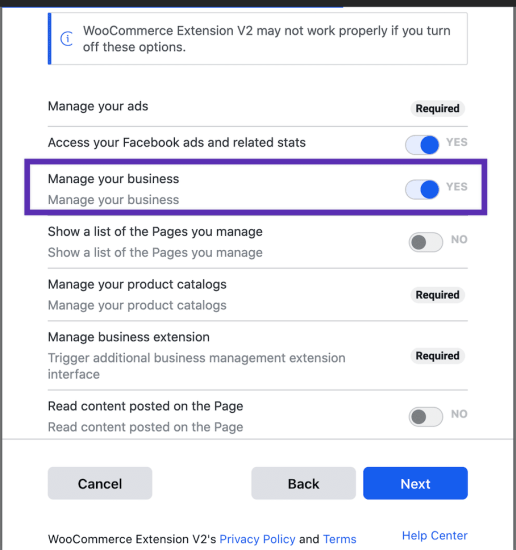
I am getting a “Something went wrong when connecting to Facebook!” error. How can I connect to my Facebook account?
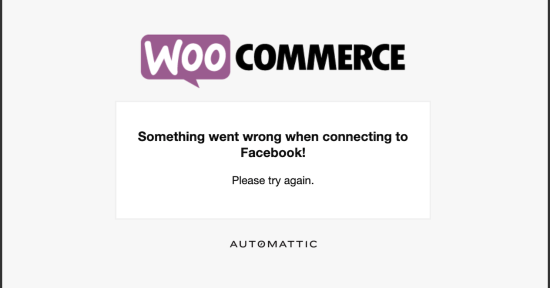
While this error can happen for a number of reasons, the most common is not allowing Facebook to ‘manage your business’ during the connection process. Make sure that this option is selected:
Help! I’ve been locked out of my Facebook account. What should I do?
We’re so sorry about that! This should now be a rare occurrence in the plugin but can occur if you create a Facebook account immediately before setting up business accounts, pages, and other assets. You can fill out this form so the Facebook team can begin recovering your account.
Why are my products not displayed on my shop after installing the plugin?
If none of the products have synced to Facebook, the most likely reason for this issue is due to the Facebook shop having been set up outside of our plugin’s wizard causing your Facebook page to link to a Facebook catalog other than the one our plugin uses. You can find out more about this configuration issue along with steps for how to address it in this document.
If only some of your products are missing from your Facebook shop, then this may be due to some of your products being out of stock or being virtual products.
My pixel is missing or not available. How can I see all the pixel’s through the plugin setup window?
As of version 2.0 of the plugin, only pixels created through the business manager can be selected through the plugin setup window. Personal ad pixels will not be available.
Versions prior to 2.0 were the opposite: Only personal ad pixels were available, and business manager pixels were not.
Customers are being sent directly to checkout when choosing to purchase a product. How can I send them to the product page instead?
By default, the link that is shared with Facebook is an “Add to Cart” URL for your product to speed up the checkout process.
You may want this to be the product URL for a number of reasons. If so, you can use this code snippet to send the product URL to Facebook instead.
How do I re-connect the plugin to my shop’s Facebook page?
A frequent troubleshooting step when encountering issues with product sync or the connection, in general, will be to re-connect the plugin to Facebook. Learn More
Facebook shows “Sorry, this content is not available right now”. How can I re-configure the plugin?
If you lose access to the account that configured the plugin, or Facebook invalidates the account or merchant settings configuration, this message will be displayed.
In this case, you may need to re-connect the plugin or, if that doesn’t work, reset the plugin settings.
How can I get Facebook to display prices including tax?
The price synced to your Facebook catalog should include tax if your WooCommerce shop is set to display prices including tax. You can find this option available at WooCommerce > Settings > Tax and select “Including tax” from the Display prices in shop drop down option.

That said, there are other tax options at play here. For instance, if you have the store set to “Entered prices exclude tax” yet the Display options are both set to “Including tax”, WooCommerce will need to generate tax on the product price before sending this across to Facebook. If the tax option is set to generate taxes from the “Customer’s address” then this might not work, as the Facebook sync has no specific customer address.
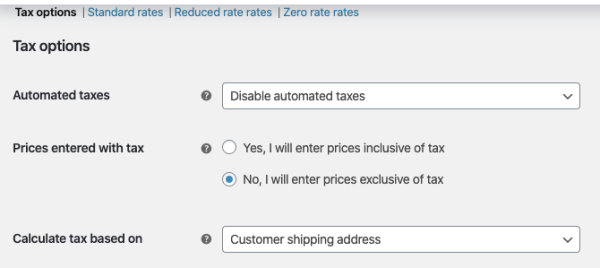
In this case, you’ll need to work out the best workaround:
- Setting the “calculate tax based on” to the shop address
- Enter prices inclusive of tax
Some events are not triggering with caching plugins (Breeze, SG Optimizer, Asset CleanUp, etc). How can I fix this?
Some caching plugins have some optimization settings that cause a conflict with the pixel tracking code that will result in the event not being triggered. This can be tested with the pixel helper Chrome extension and seeing that the ViewContent (as an example) is not triggered on the view product page.
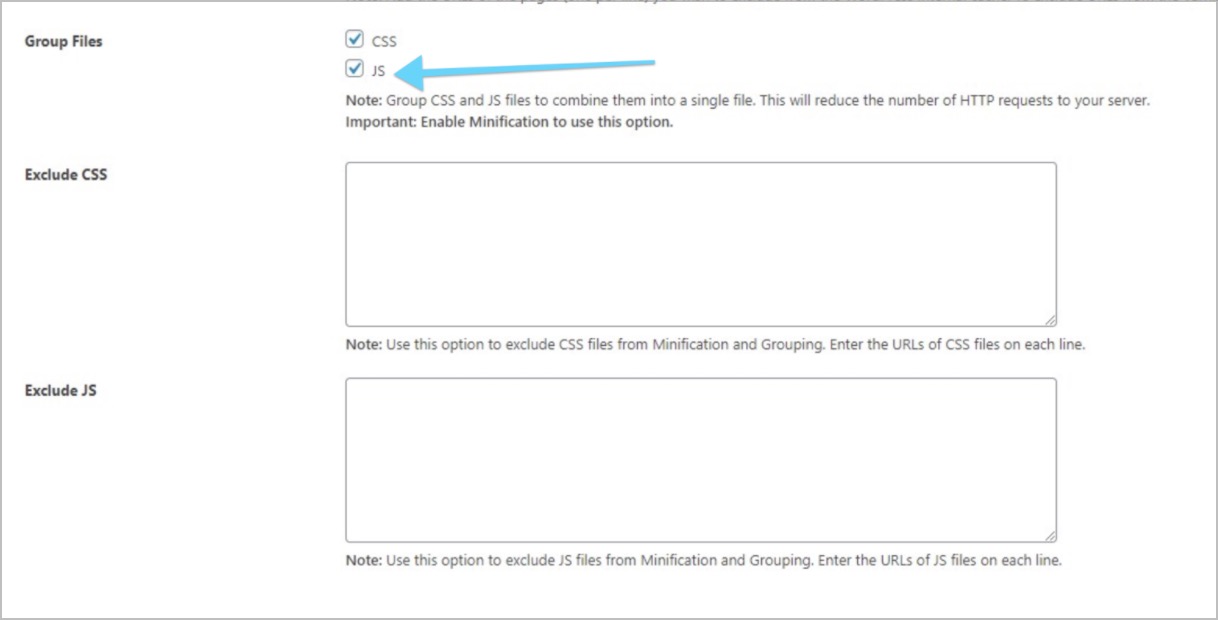 The fix is to disable grouping of JS
My Messenger icon is overlapping with another element! How do I move it?
Currently, there is no setting to move the Messenger icon or popup. However, if you add the following custom CSS, you should be able to nudge them over to the left a bit:
.fb_dialog, .fb_dialog_advanced, .fb_customer_chat_bubble_animated_no_badge, .fb_customer_chat_bubble_pop_in {
    right: 60pt !important;
}
Nudging up would only get it hidden by the messenger box, so moving to the left is the best plan here. The default is 18pt.
Is it possible for me to bulk delete or reset all of the products in my store that are synced to Facebook?
Occasionally, deleting or resetting all products from the Facebook catalog and then letting things sync again is the only way to fix strange issues. This requires a code snippet, which you can read more about here.
How do I remove the plugin, WooCommerce Facebook app, and created system users?
Clicking the “Uninstall” link in your settings will not remove the app from Facebook and any associated system users. Find out how to remove these as well here.